“Show me the closet!” best describes the most popular request I’ve gotten so far regarding our home addition/remodel we took on starting back in 2015. Yes, that’s right, a three year project. That was certainly not what we intended, but I have to say, we have learned a lot from our little adventure, and boy do we have some stories!
For those of you that have been following along on my Instagram page, you might remember a picture I posted back in the early part of the year of me in my favorite new space, my home away from home, my hideout, my woman cave, my personal boutique, aka….. my dream closet. I received questions about paint color, cabinet maker, designer, etc. So, now that I have launched my full Livin’ Sharp blog, I can share all the details with you, including more pictures!
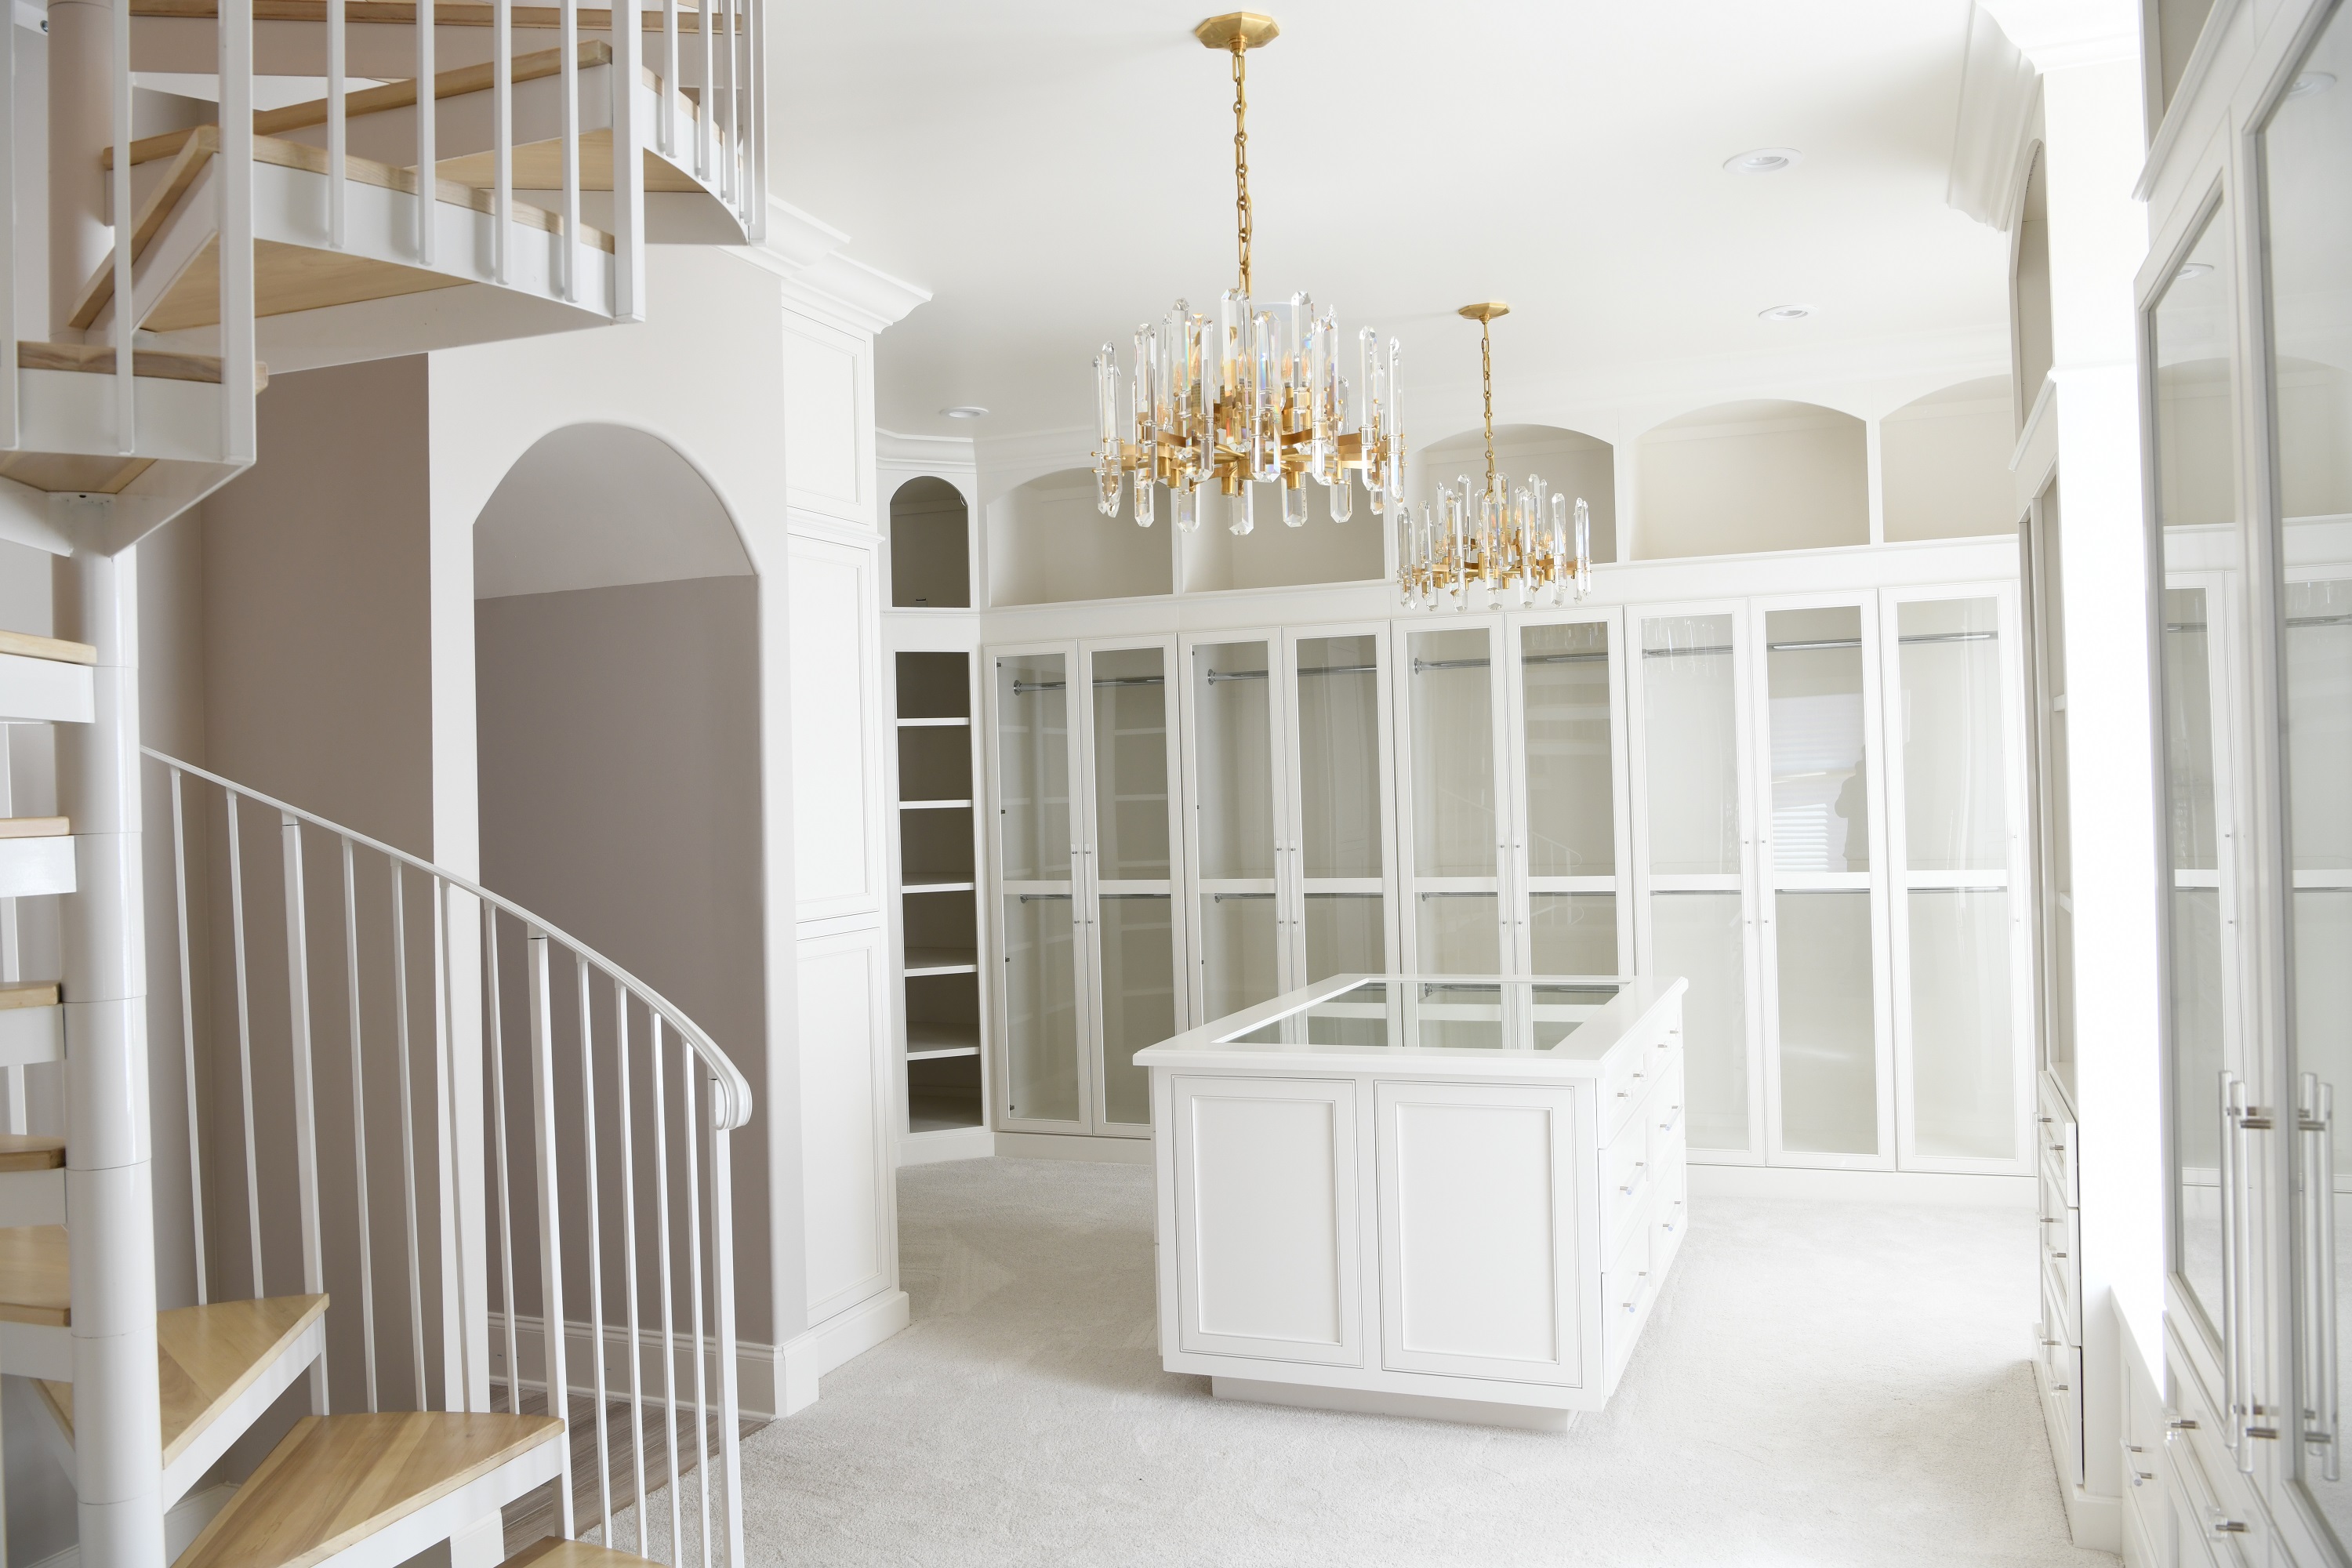
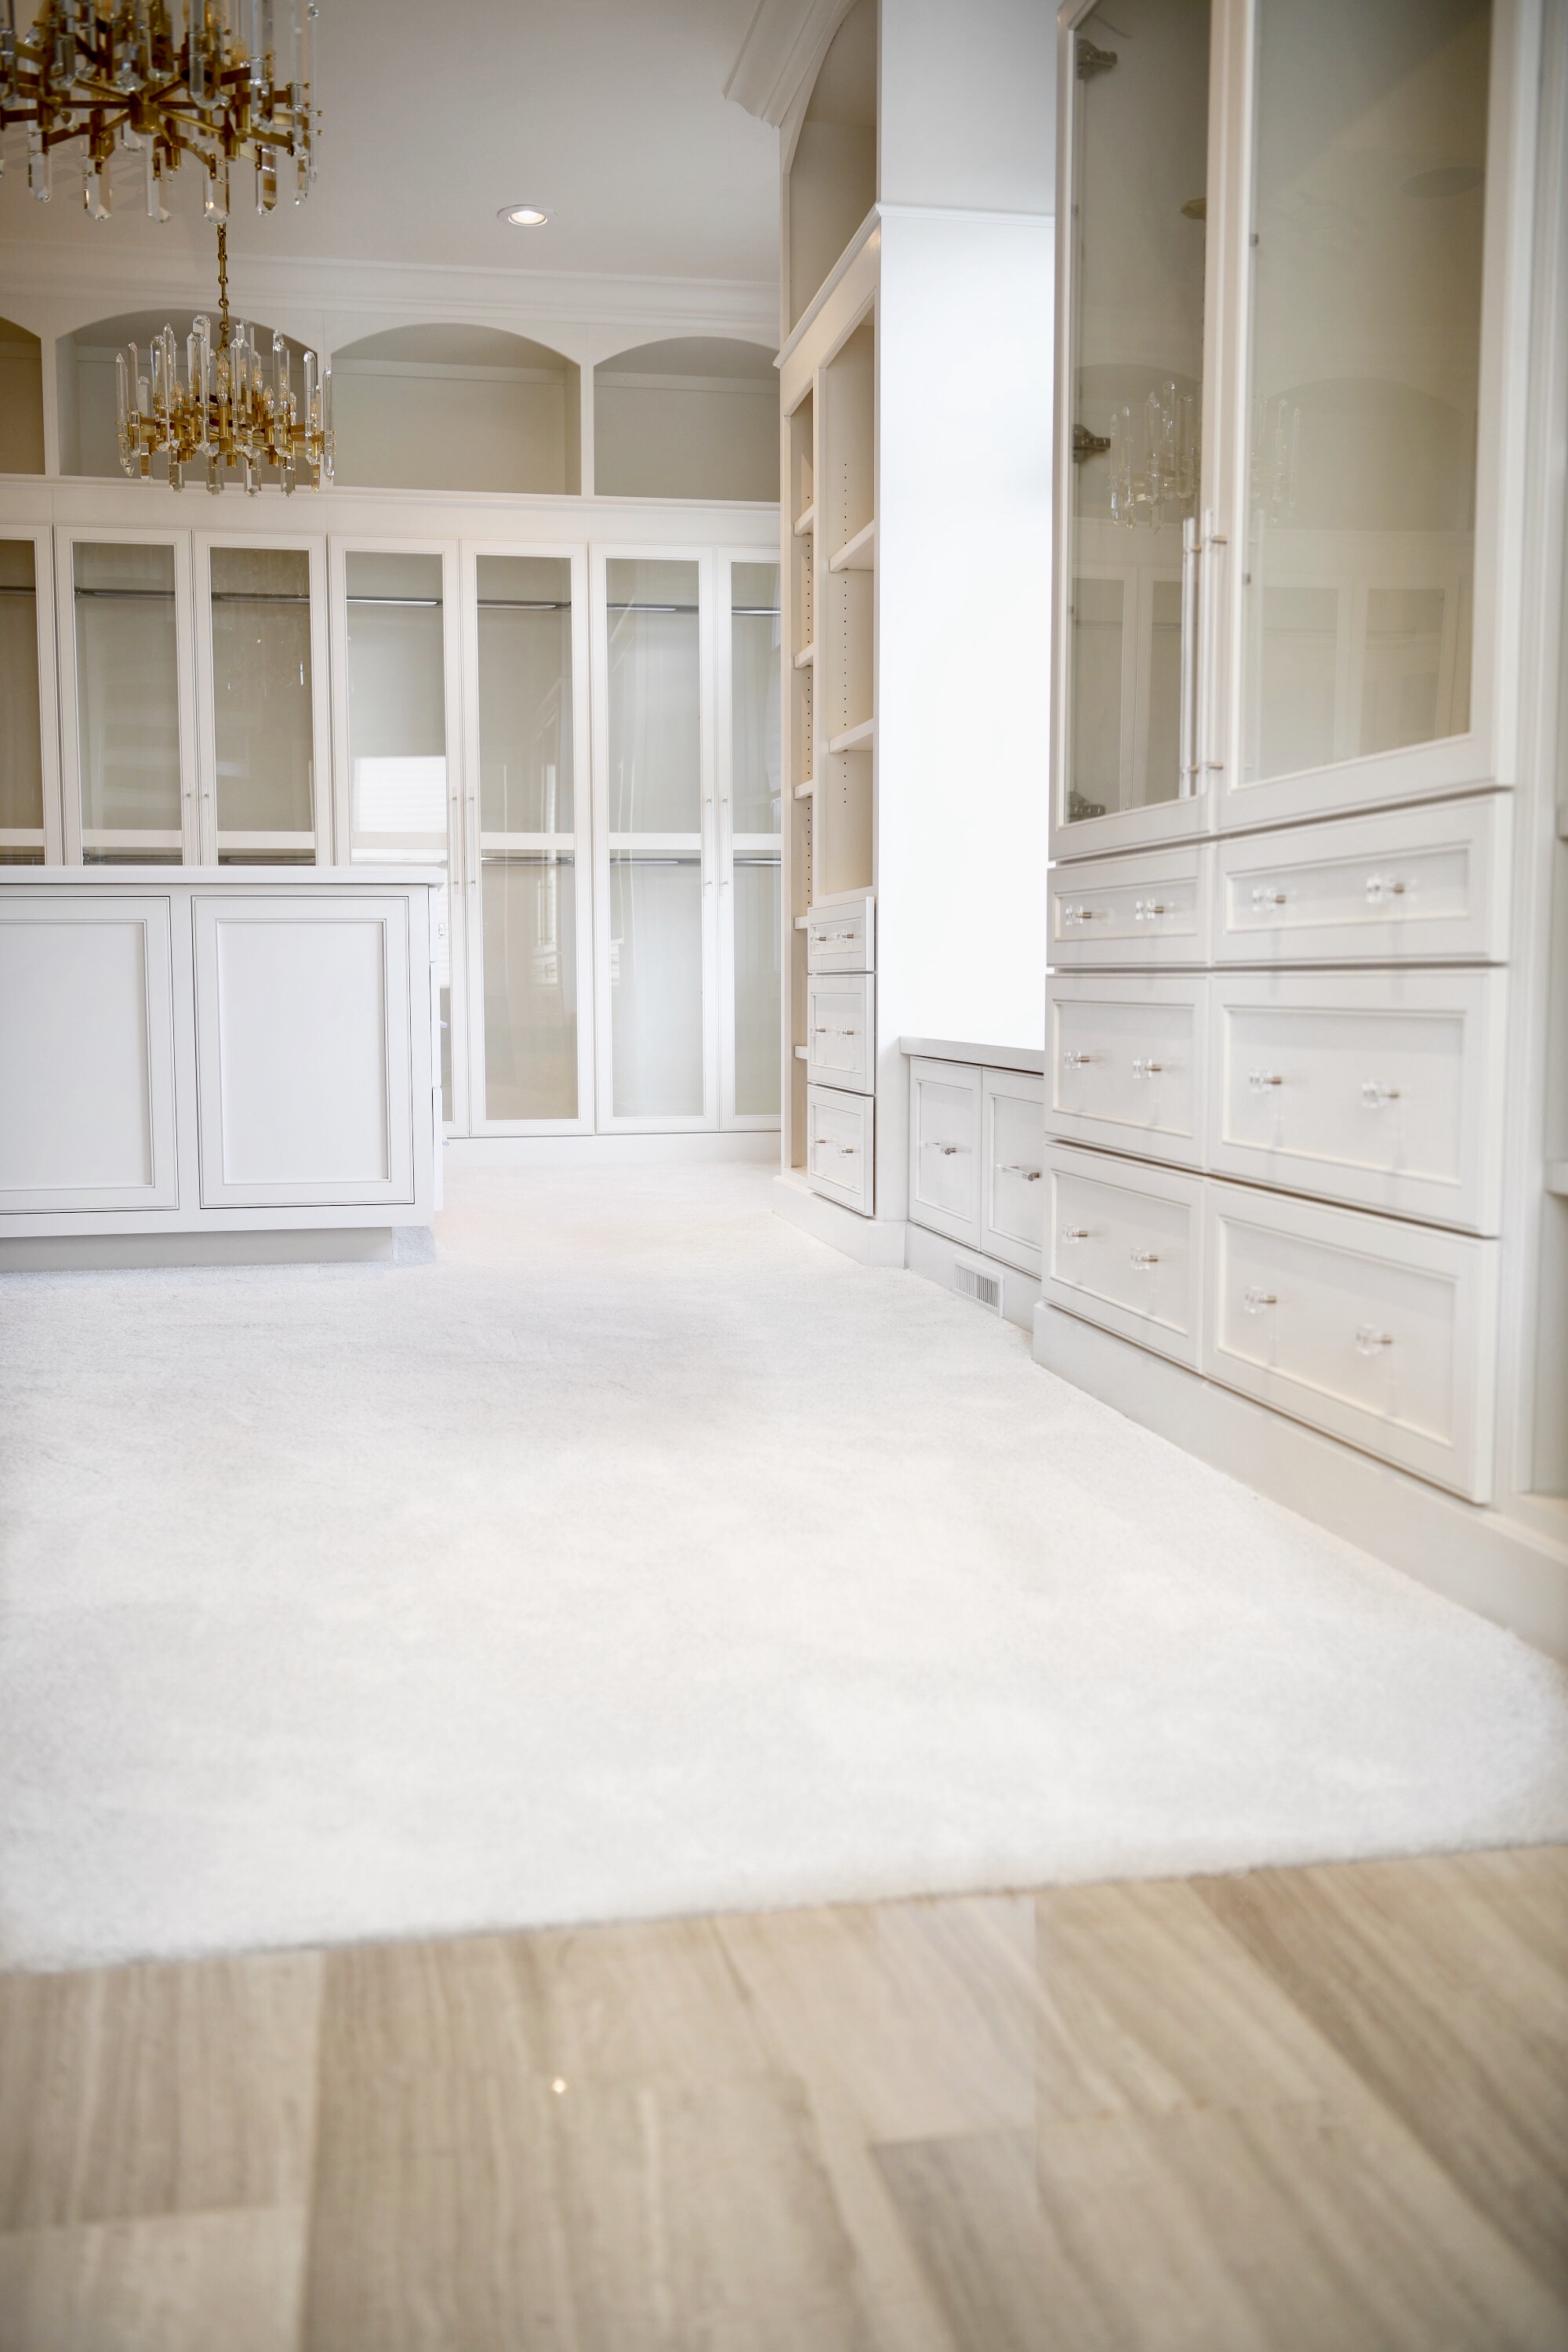
One of the details of this space I contemplated the most was to “door or not to door”. I love the look of cabinet doors because it keeps a closet looking clean and organized, and doors add a nice sleek detail. But, I also wanted to be able to see my clothing at a glance. I love the color and style that clothes bring to a closet throughout the different seasons. So, I chose to marry all of those elements and use glass doors. This gave me the best of both worlds…..an organized and sleek feel but the ability to see my clothes and enjoy the style they bring.
A nice detail to functionality behind each door is the ability for each cabinet area to function as either long or short hanging space due to convertible hanging rods. This way I’m not limited to how many short or long items I can hang, and I can change it up with the seasons. In addition to long and short hanging cabinets, there are also medium length cabinets on each side of the room which add nice optical variety and create the perfect space for mid length jackets and shorter dresses.
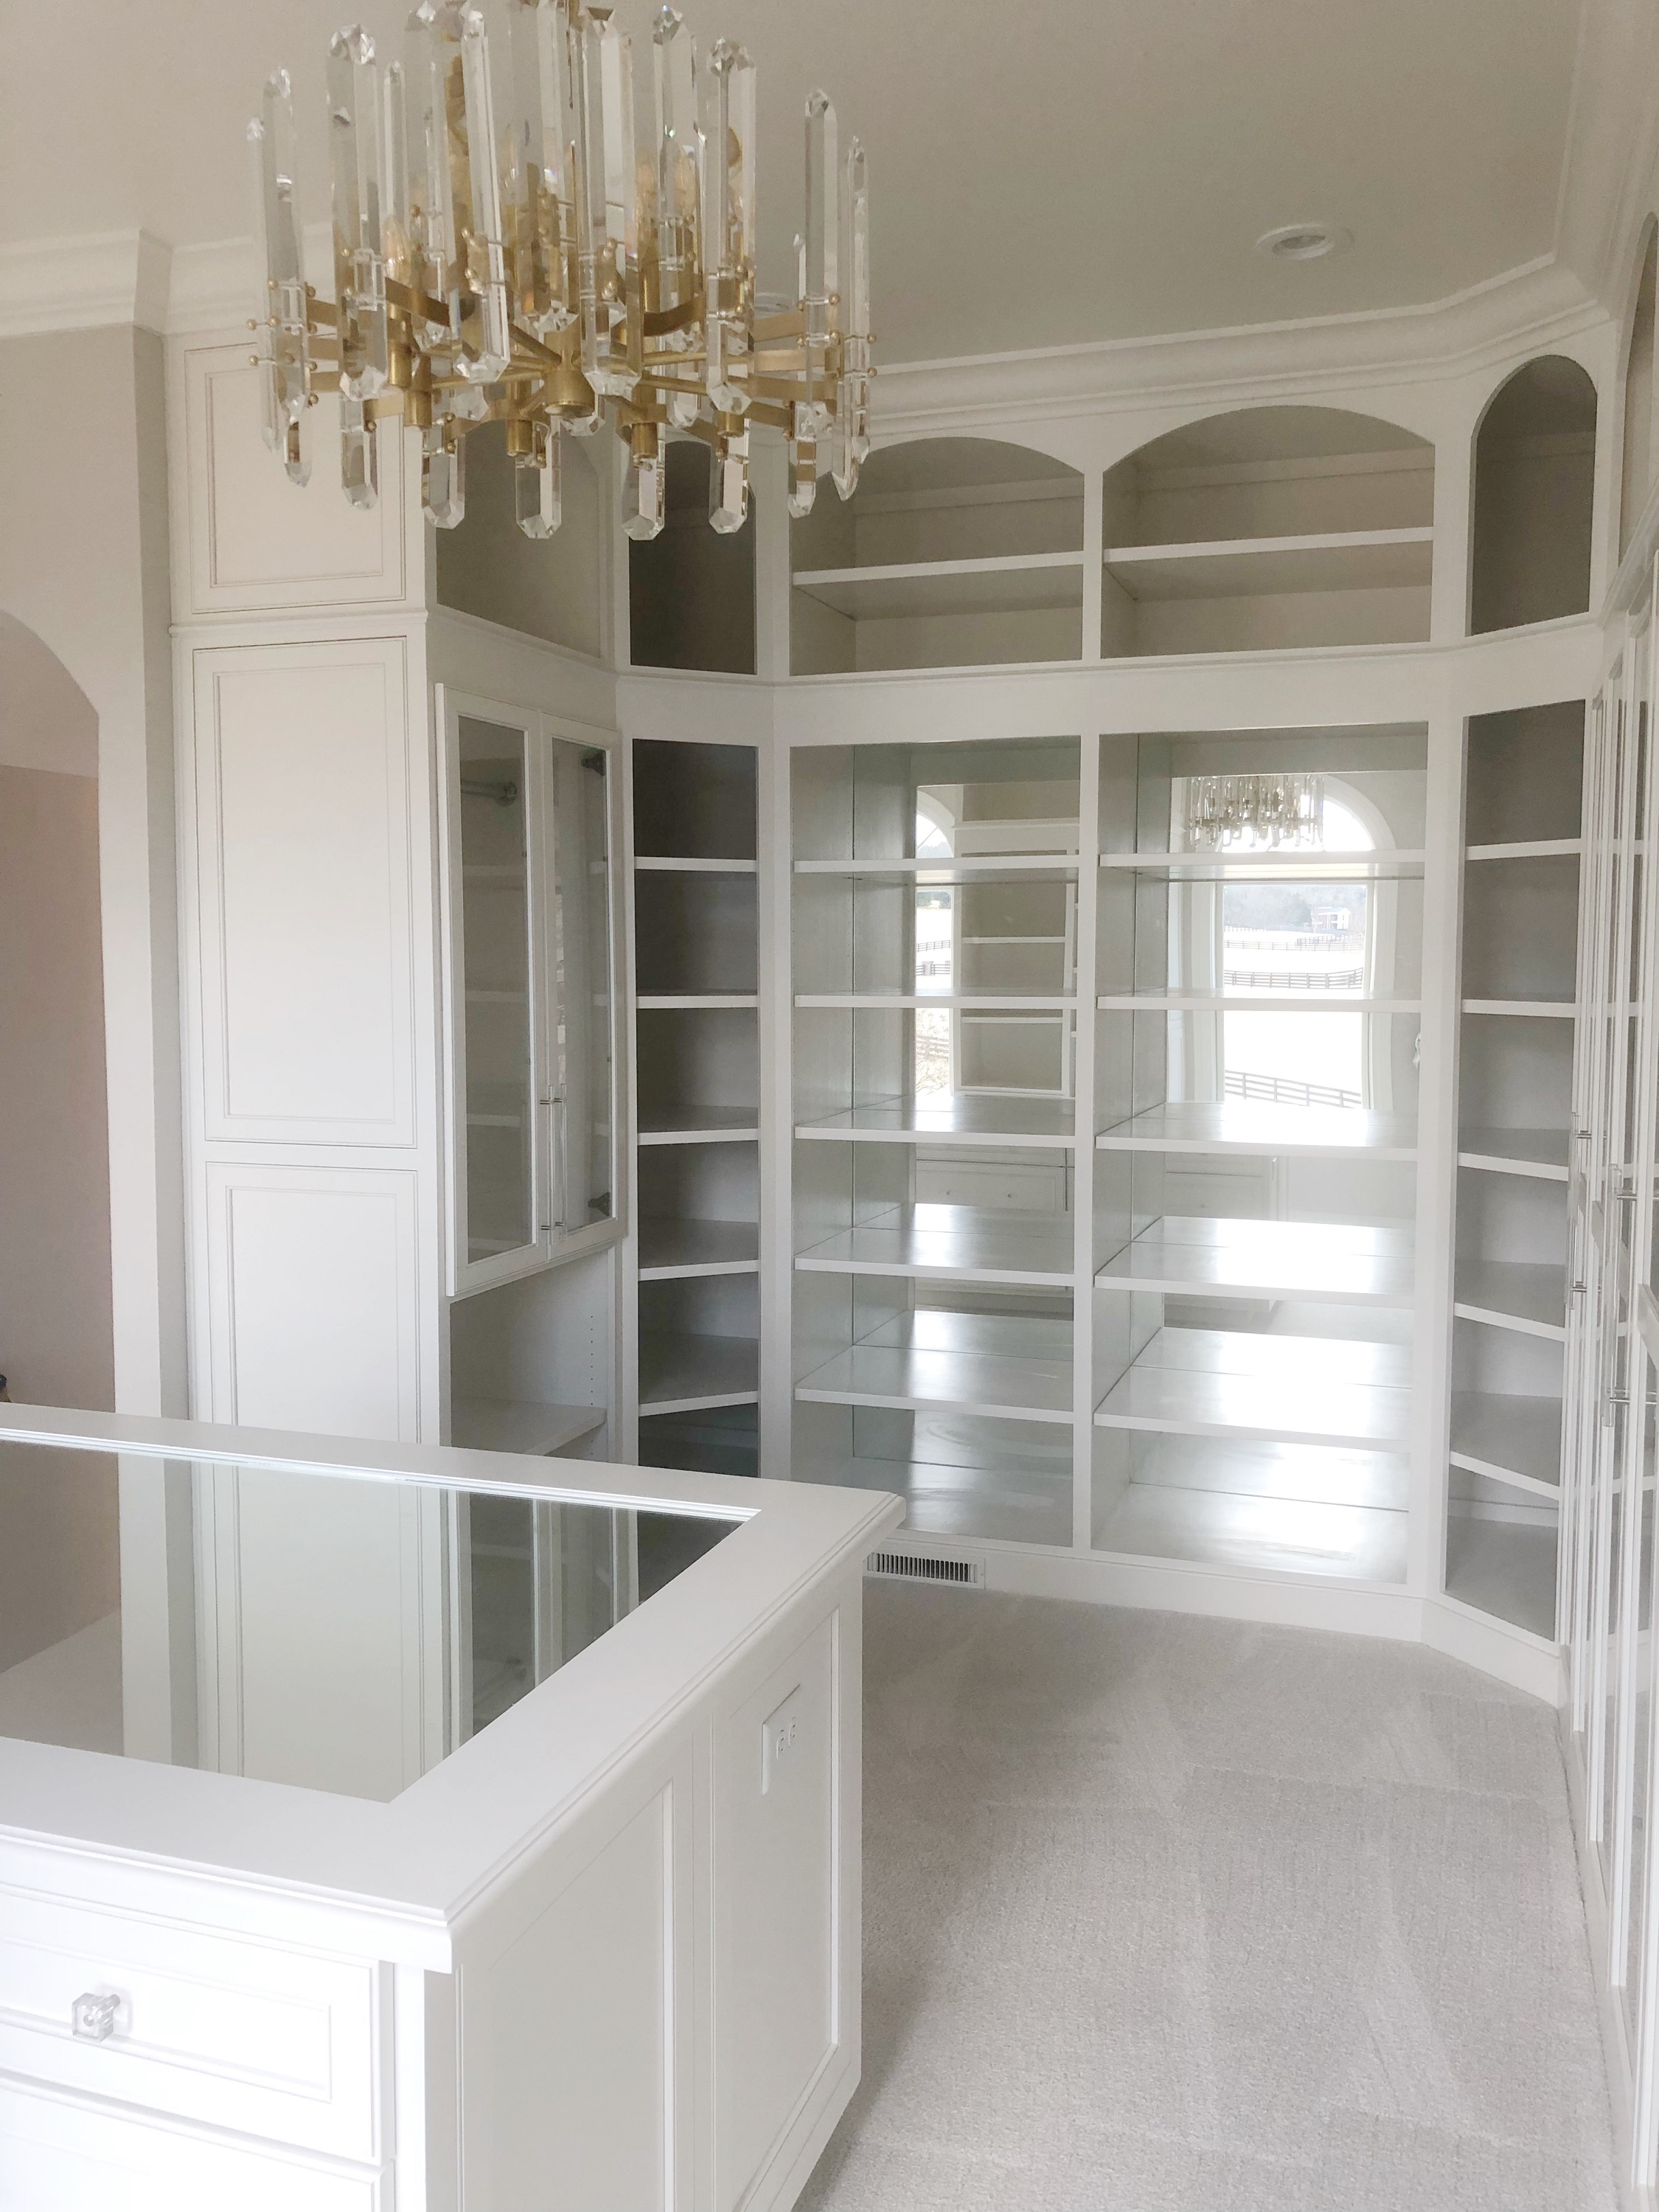
Having a good amount of cubby and shelf space was an important detail to me as well, and I wanted the sizes to vary throughout the room in order to create more interest in the space. So, the design includes a shoe wall, upper open cabinets along every wall, and cubbies throughout the room to assist in the placement of bags and other accessories that will live around the clothing behind the glass doors. And all of the shelving is adjustable so that I can customize each to the height of the items I place on each shelf.
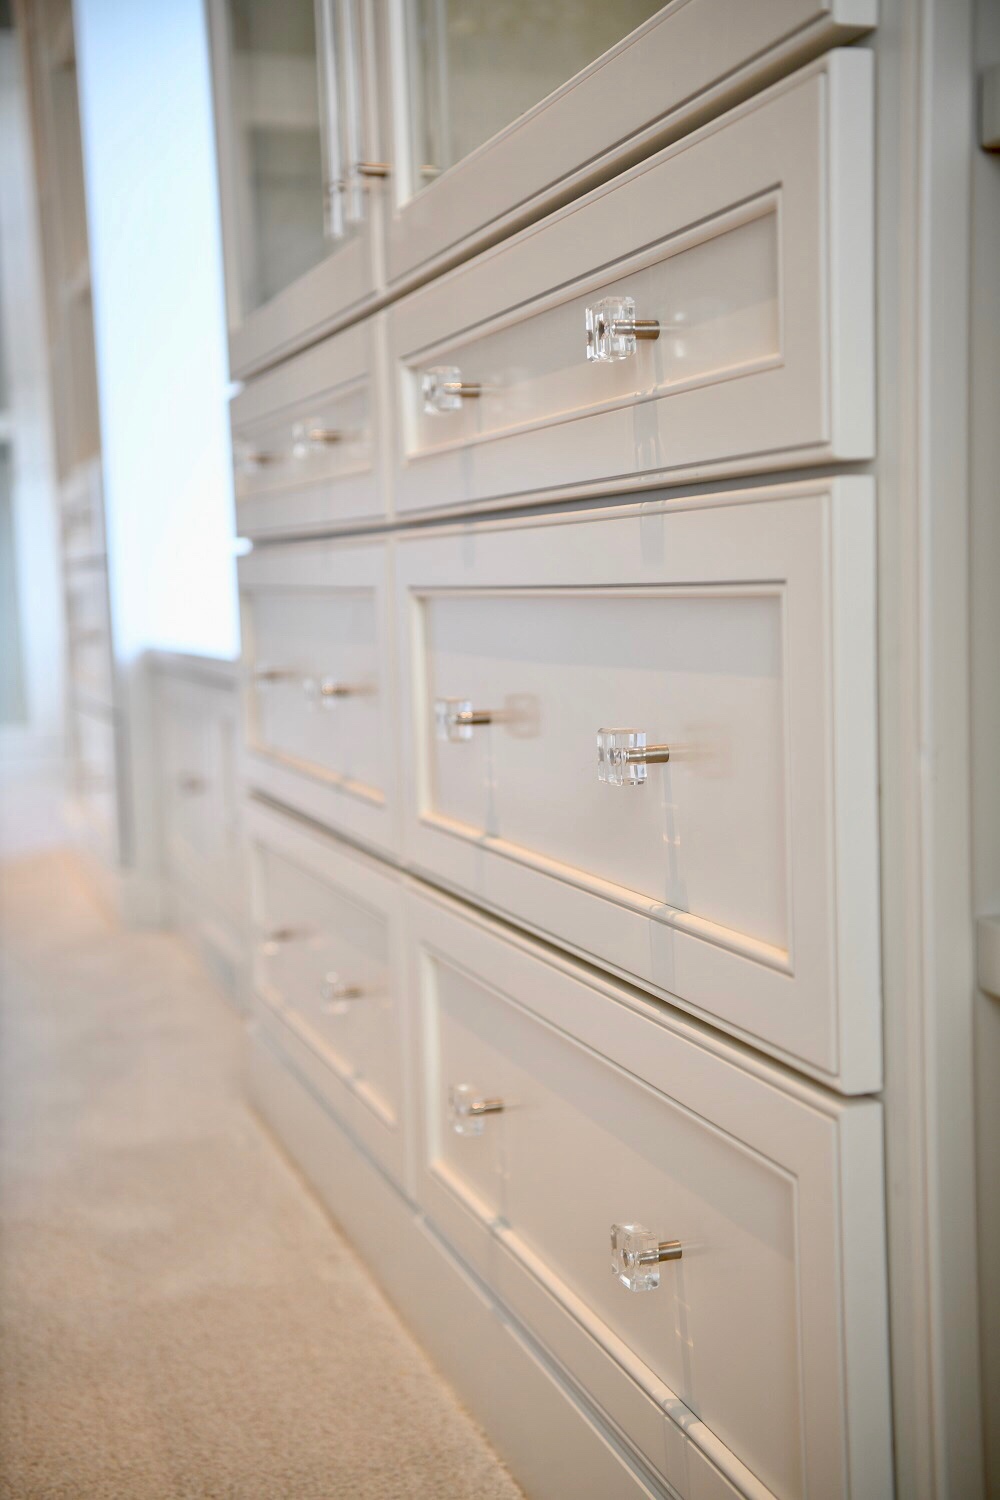
Drawer space was another element to consider. The center island is a perfect size to create a flow around the room, but not overtake the floor space. It holds 9 large drawers and a built in hamper that looks like the other drawers and is positioned in a way that creates a great little area for a round ottoman in front of the main shoe wall. There are an additional 11 drawers built into the wall cabinetry that extend down the longest wall of the room.
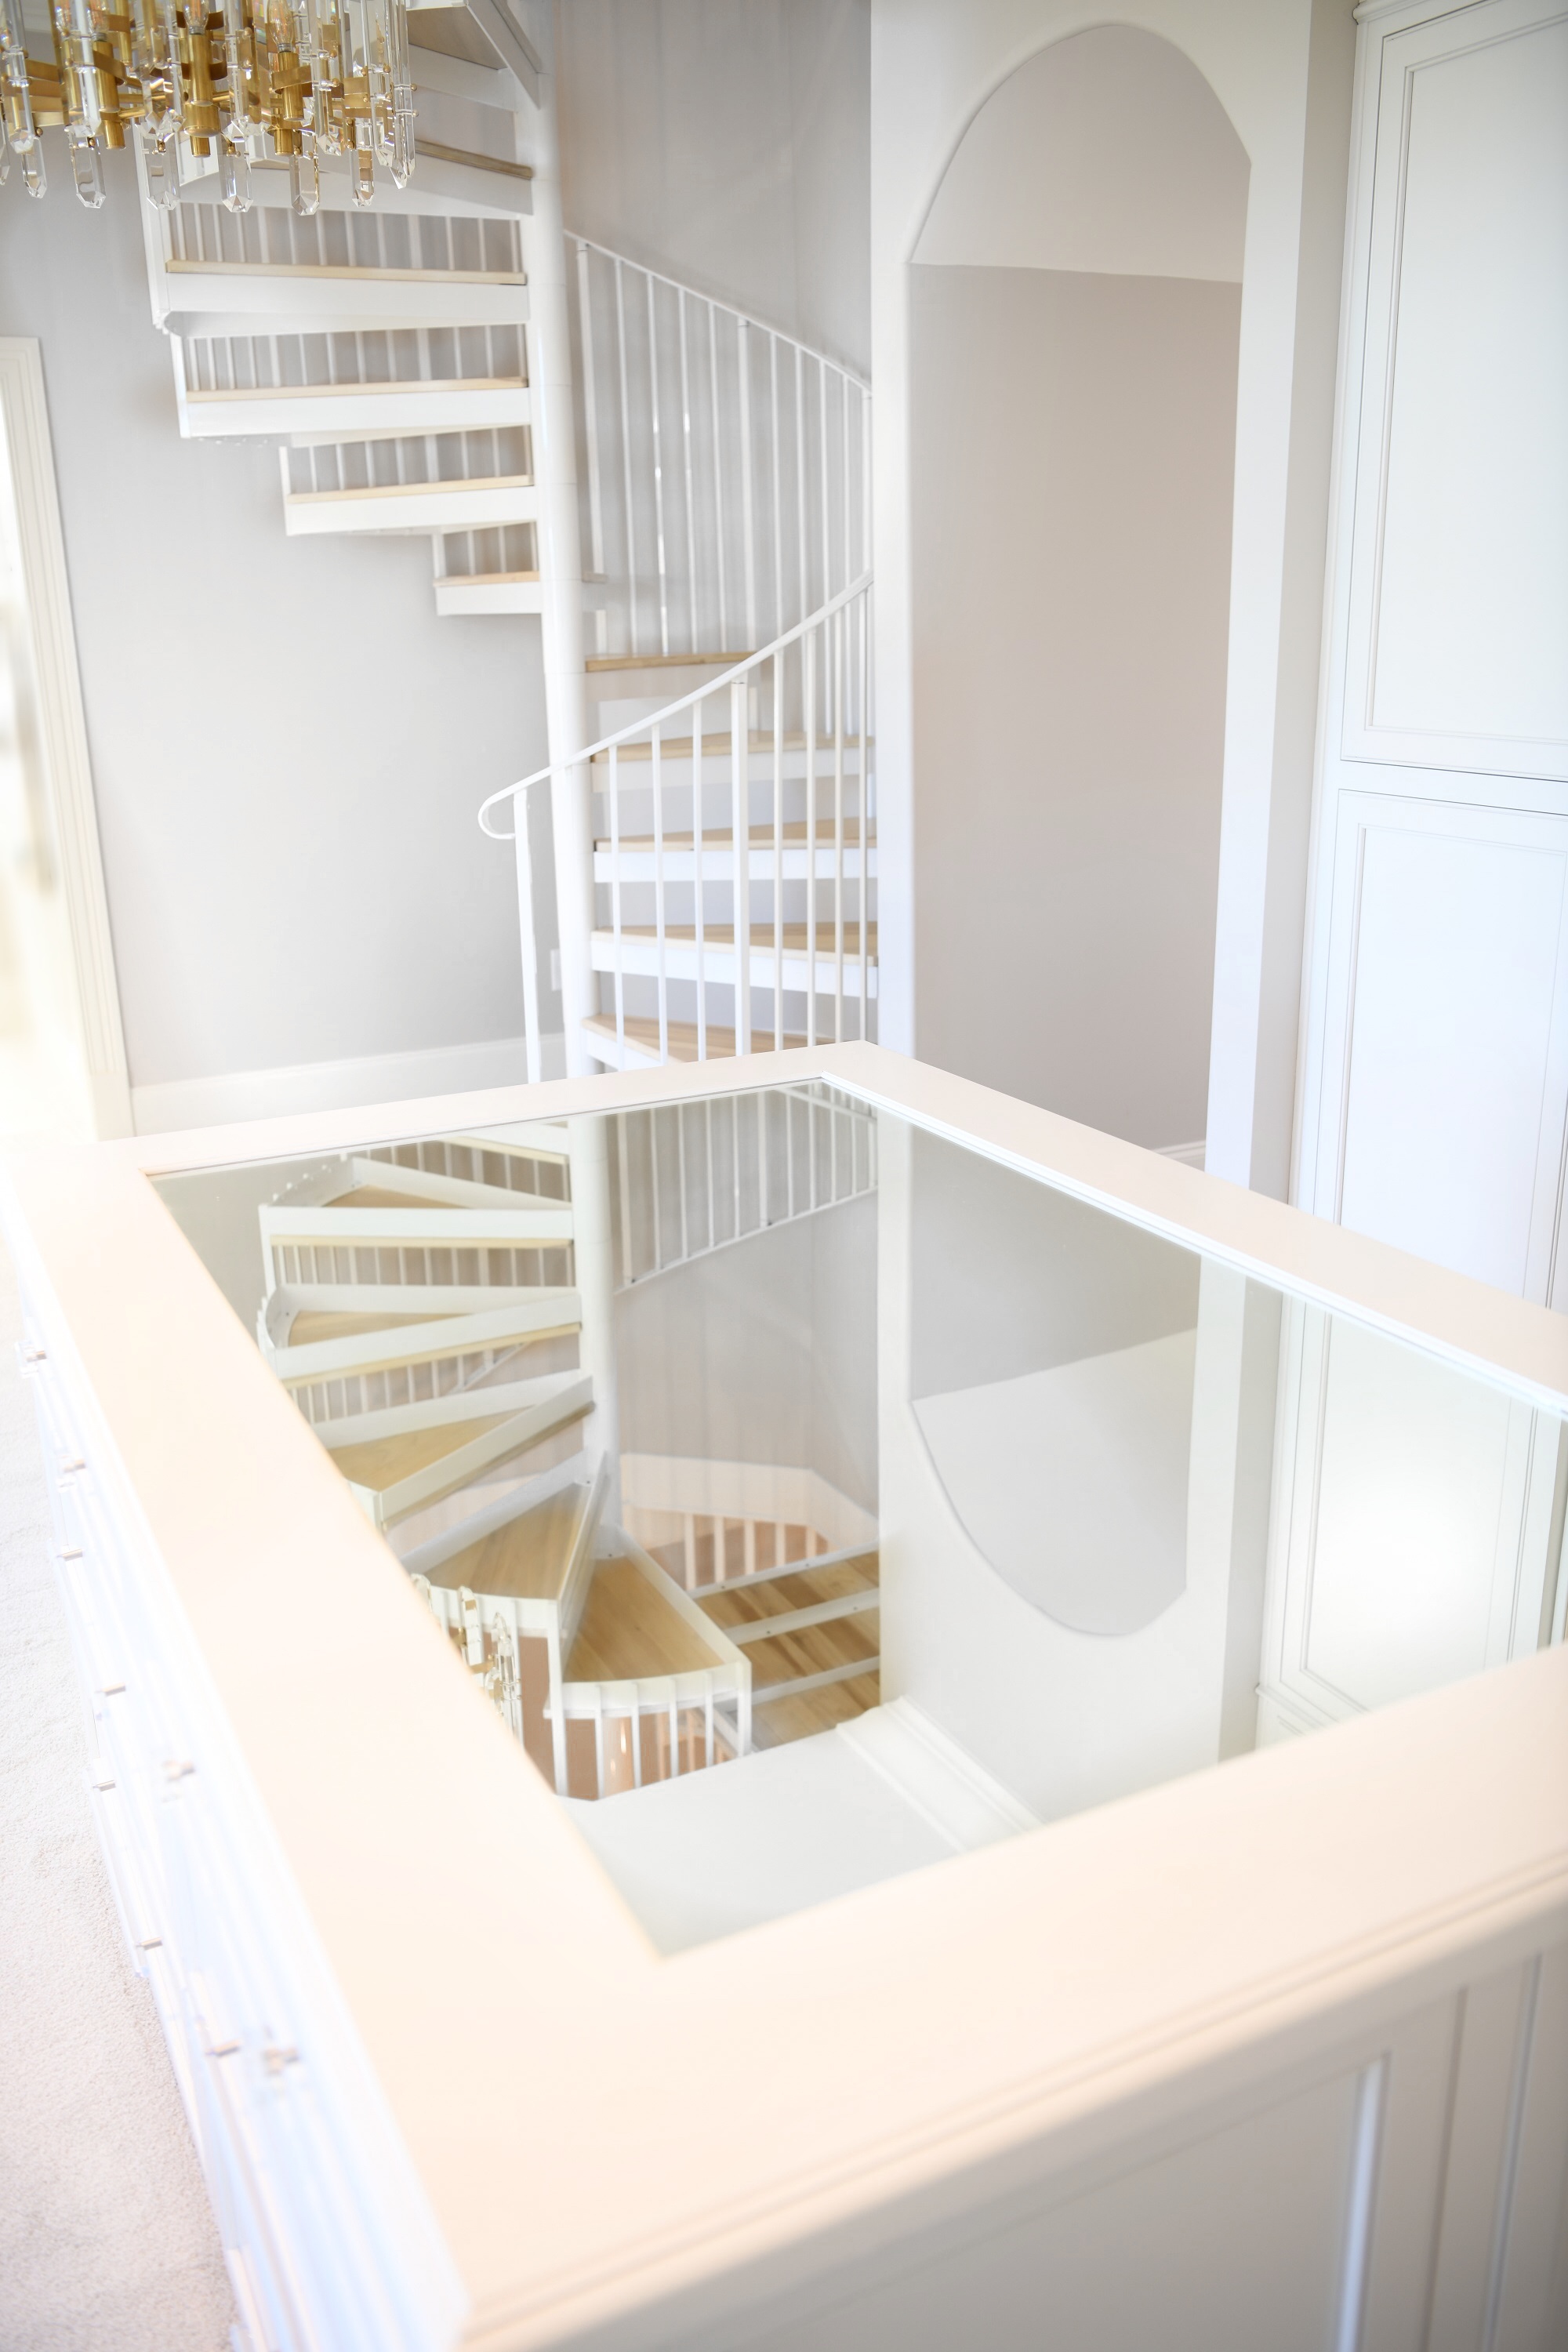
When deciding on the look of the island, I was originally going with a stone slab top, but at the last minute (after looking through so many beautiful inspirations on Pinterest) I decided to go with a mirrored top. I felt this fit the style of the space better. The mirror element is also carried throughout other areas of the room such as behind the shoe wall and in the dressing room which is positioned at the other end of the closet where there is a mirrored top dressing vanity to match the island. The mirrored island ended up being a perfect touch and creates some great reflections of the spiral stairs and chandeliers.

The pulls and knobs I chose are by Atlas. These were just enough of a touch of glam to compliment each door and drawer without over powering the room. The brushed nickel finish works with the hanging rods inside the glass doors and creates a more subtle look for knobs and pulls.
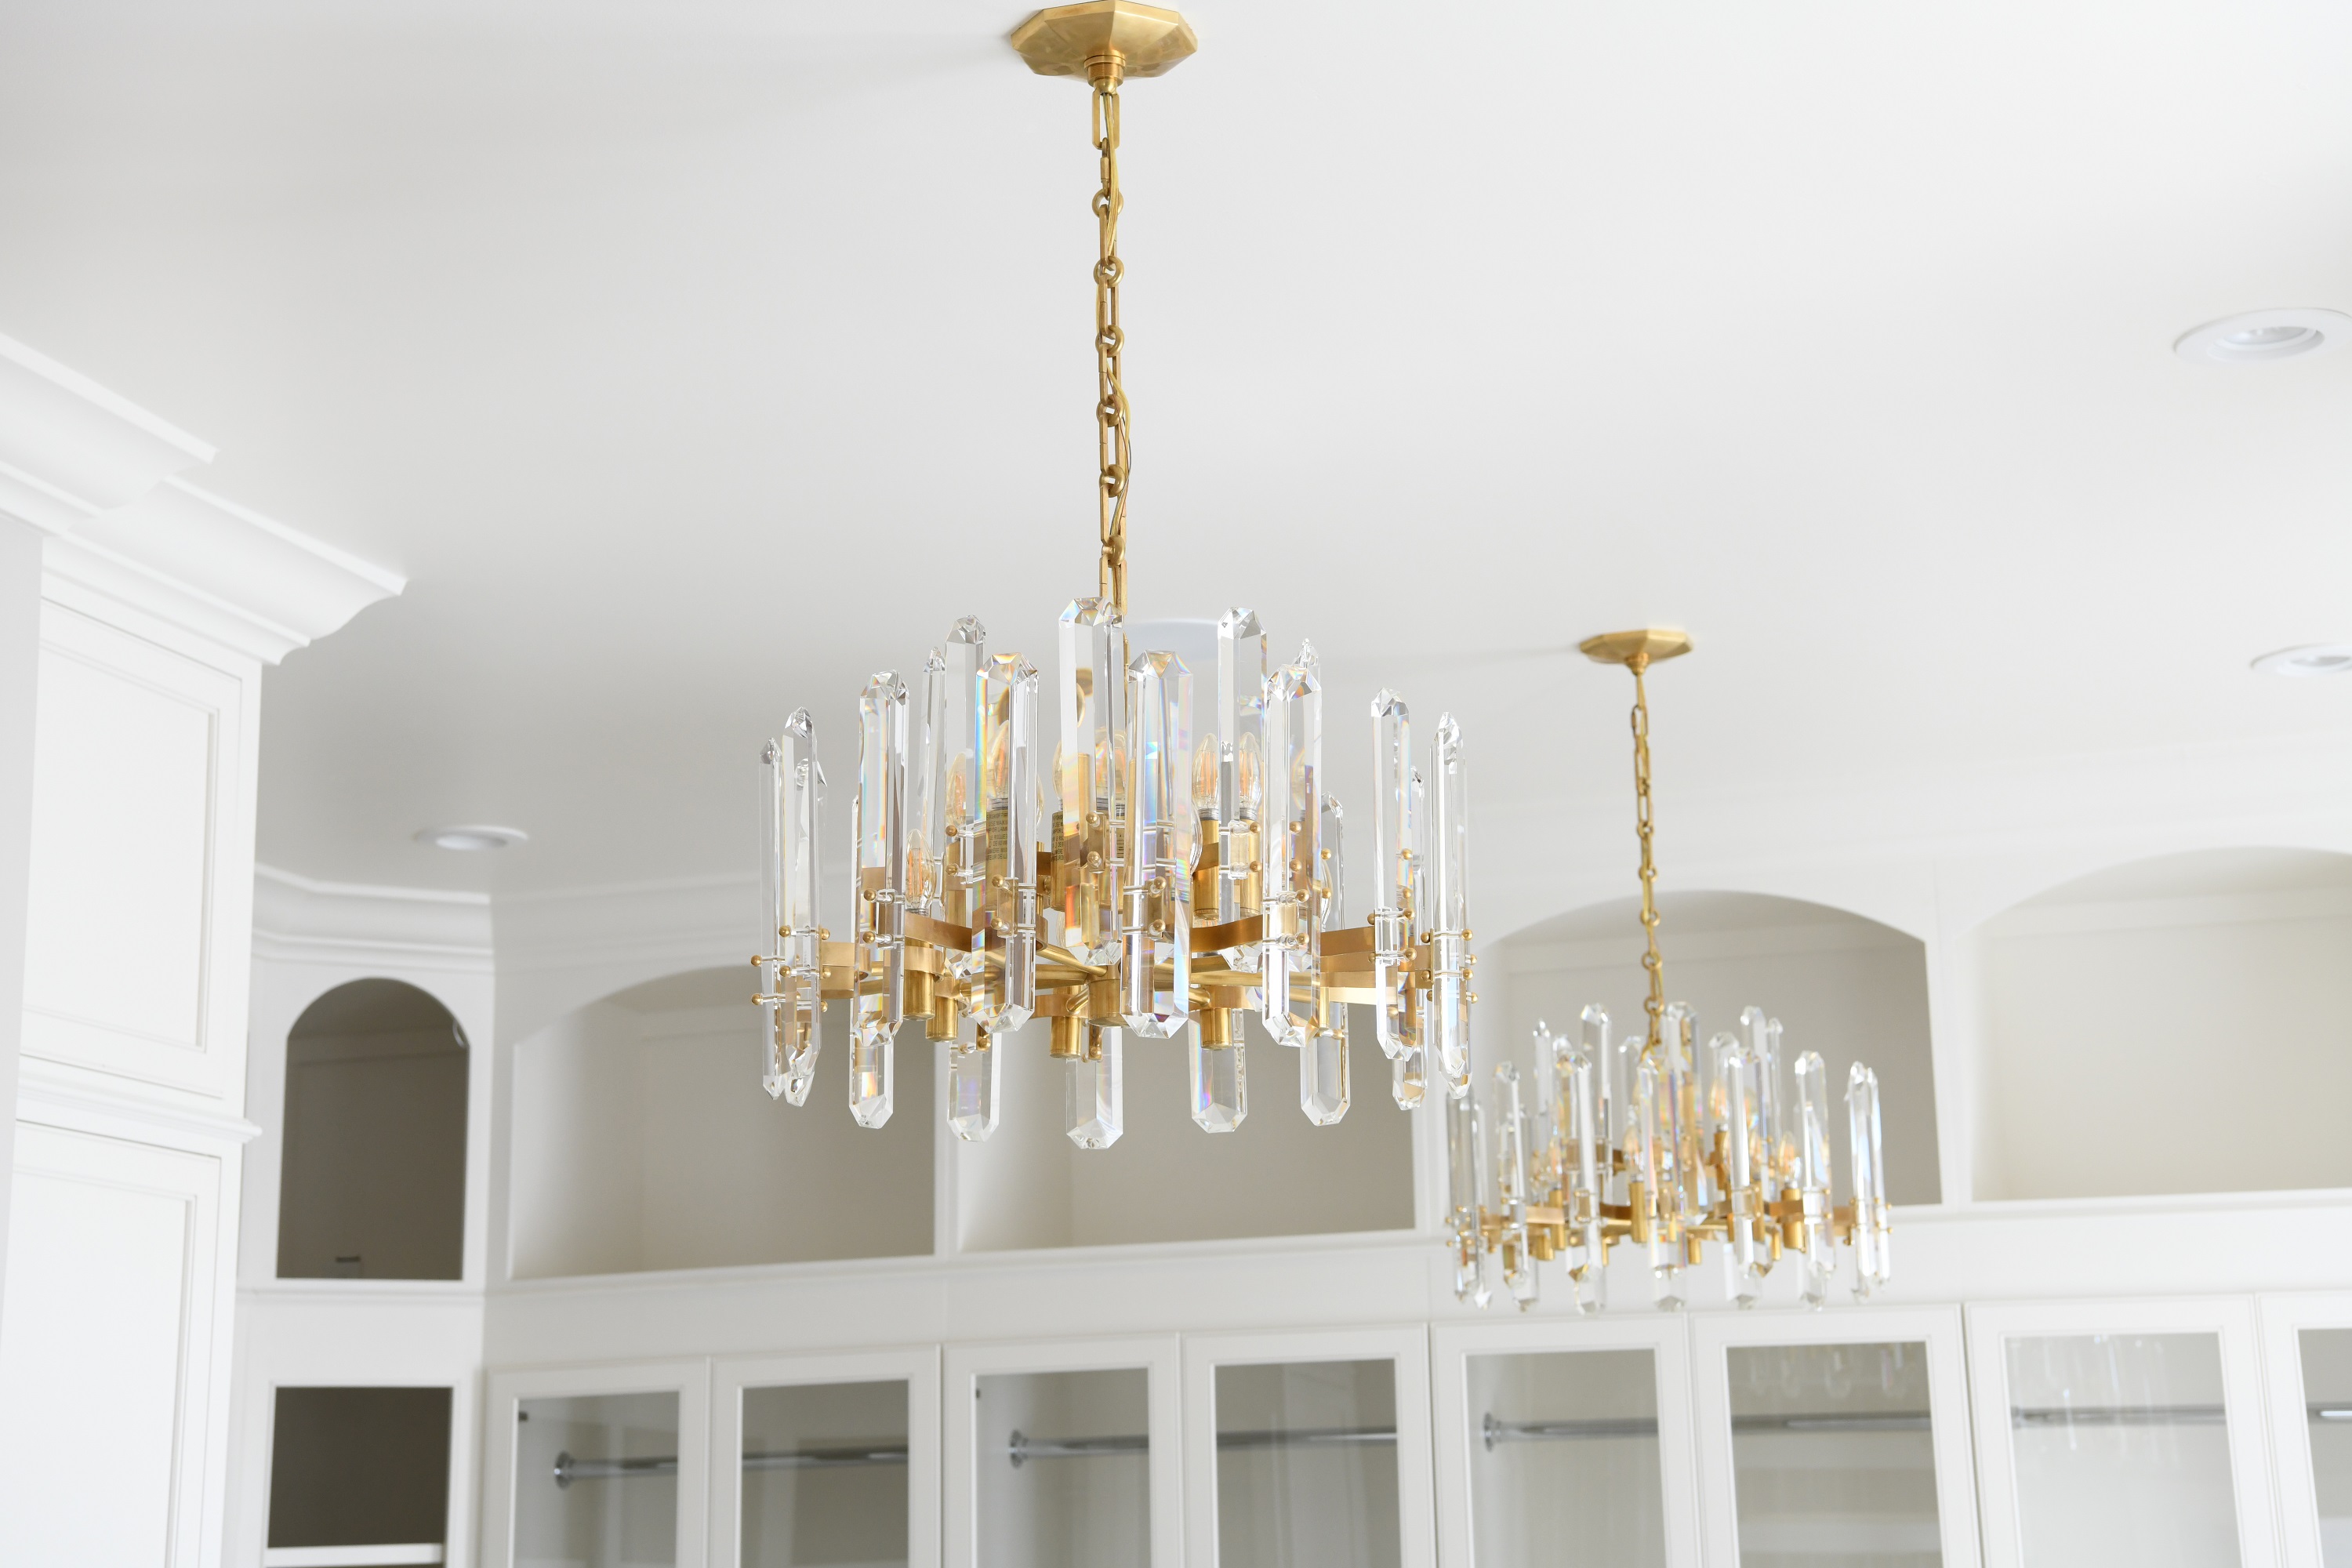
Now, let’s talk about those chandeliers! Aren’t they a couple of beauties! I found these (along with much of the lighting in our house) at Restoration Hardware. They were absolutely perfect. For chandeliers, it was important to find a look that was glam enough for my closet, but wasn’t too feminine to go in my husband’s closet. He has his very own space across the master bath, and the way the master bath area lays out allows for a peak into each closet when standing in the middle of the master bathroom and looking to the left and to the right underneath the arched openings. Therefore it was best if each closets’ lighting was identical.
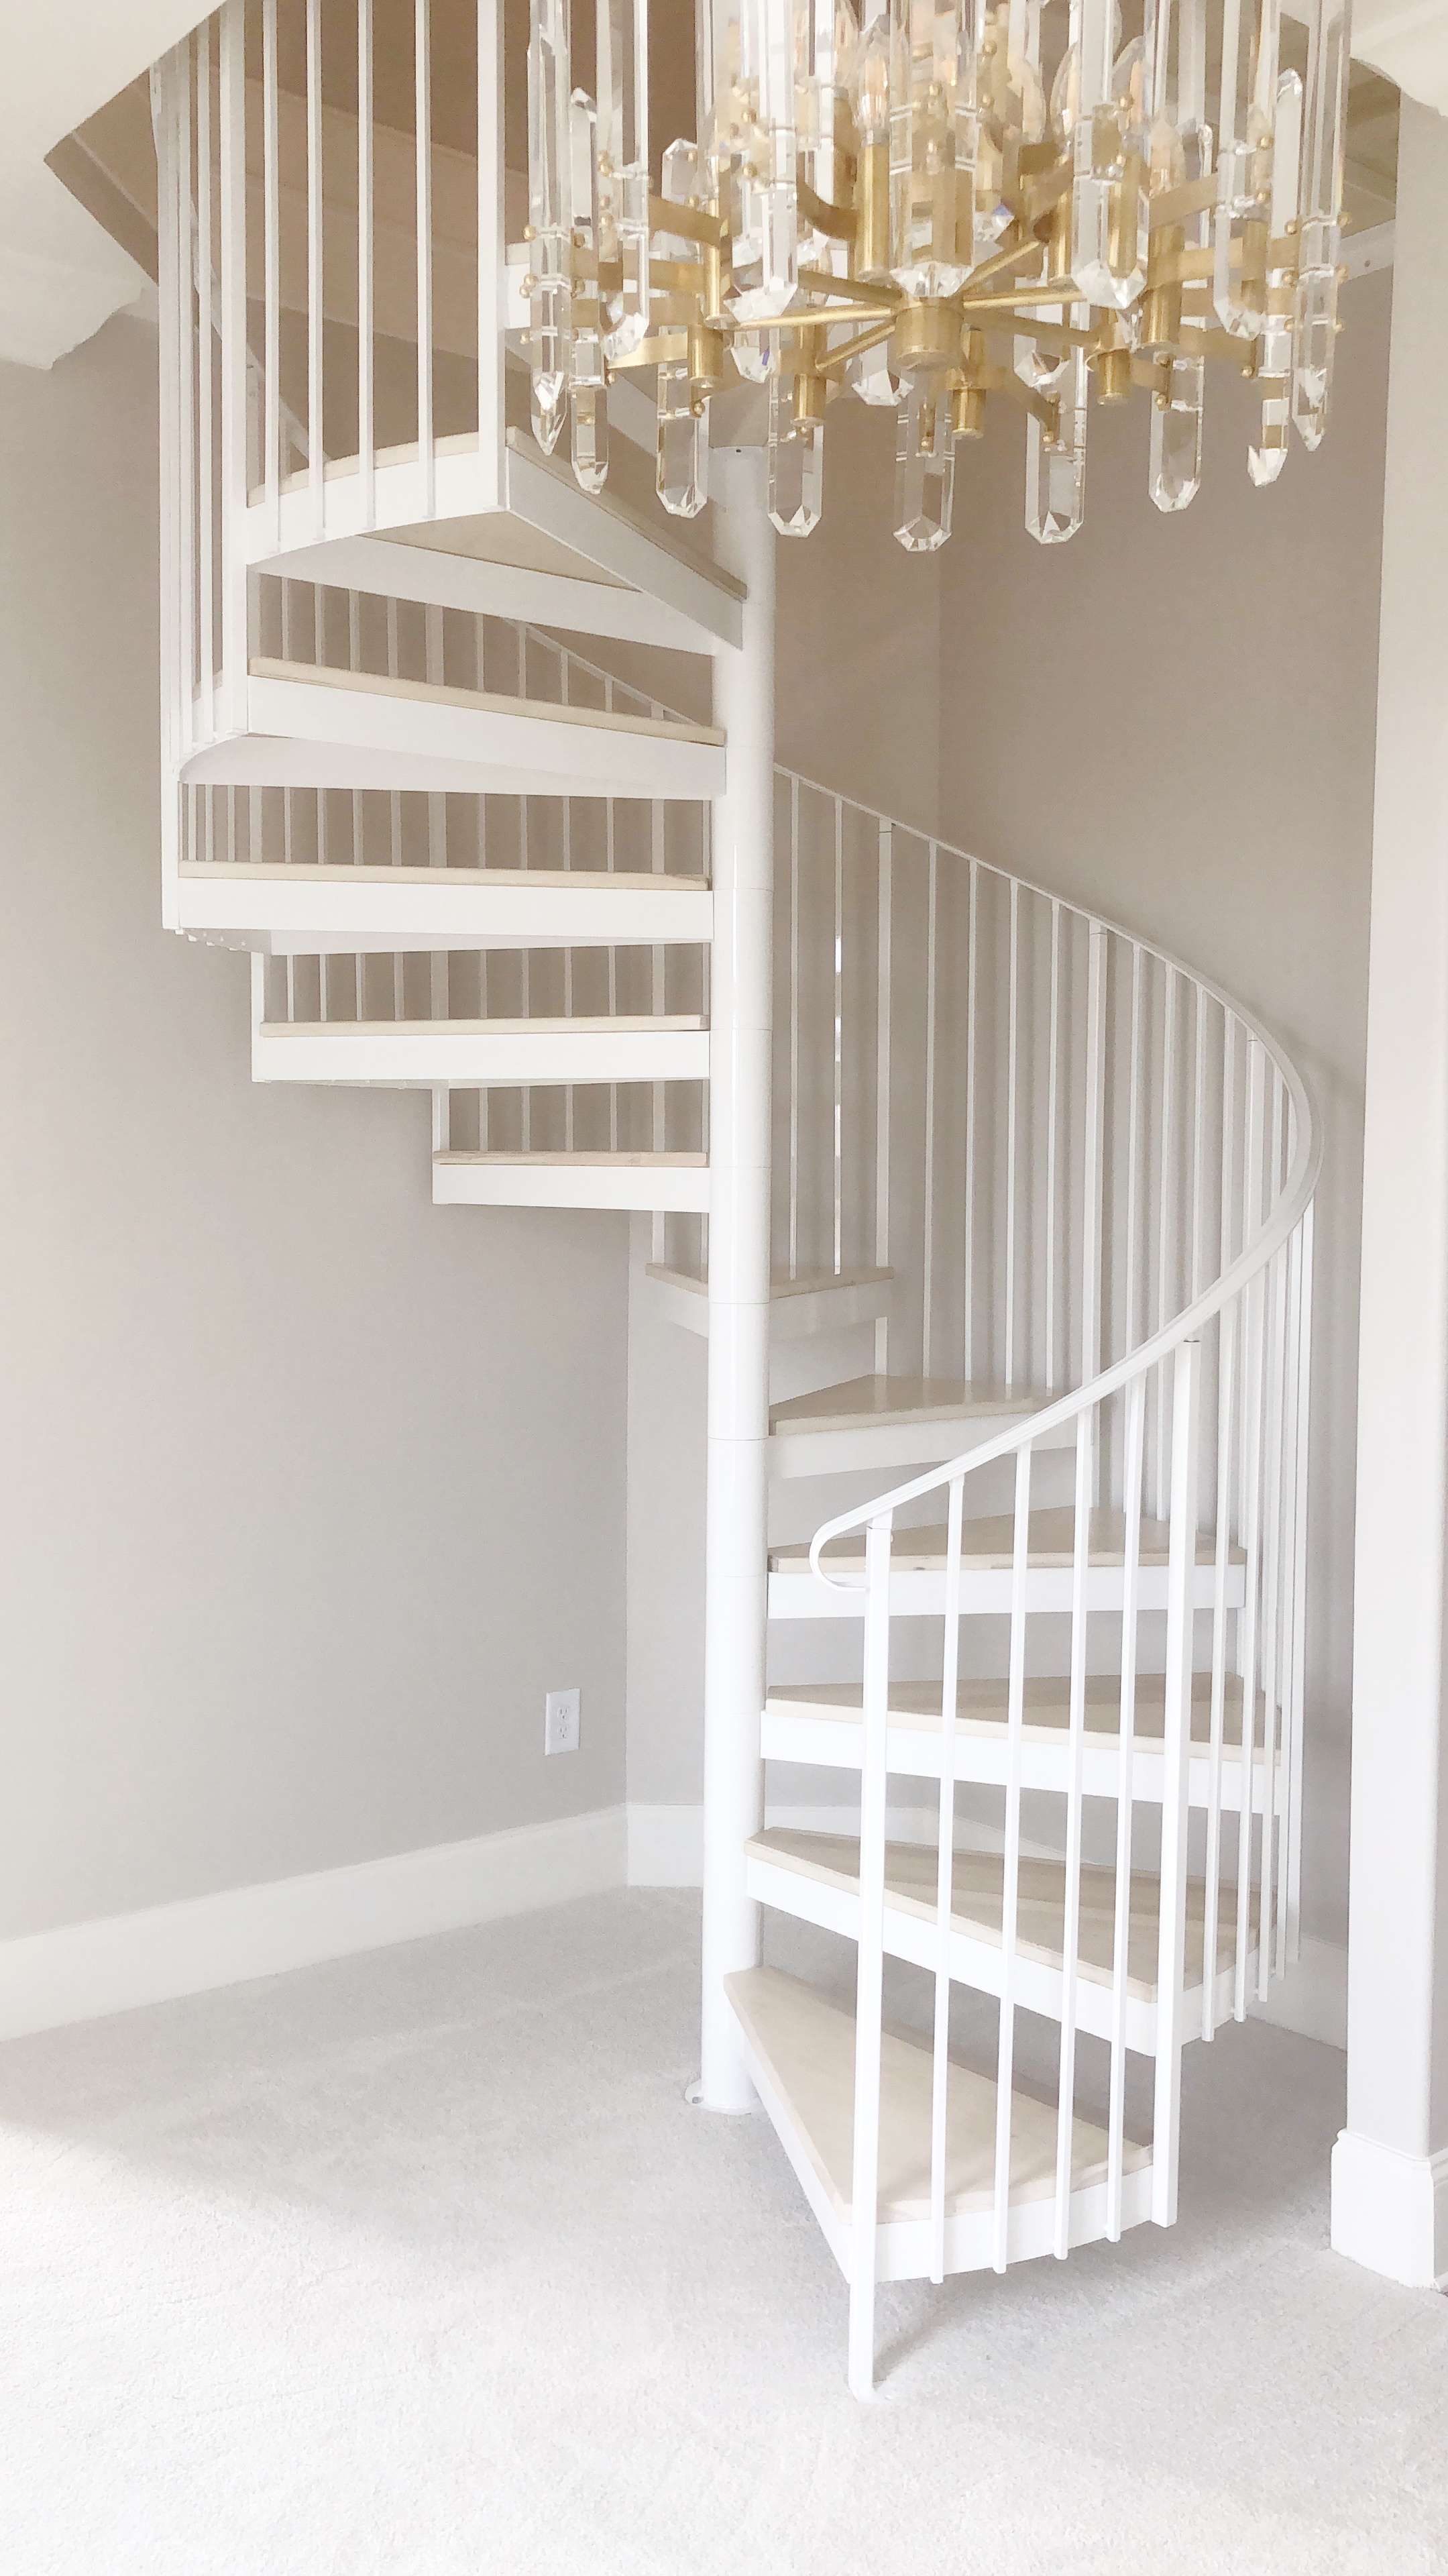
The number one question I get about my closet is, “what’s upstairs?” For now, the answer really isn’t too exciting. I decided, as we were planning the cabinetry for the main floor, to wait and live in this space for a while before installing, or moving, anything large and permanent upstairs. So for now, it’s 200 square feet of carpet and painted walls. The stairs were actually a bit of an afterthought. After framing out the main closet, we realized how much space was available right above it, so the stair idea came to mind and, well, there they are in all their glory!
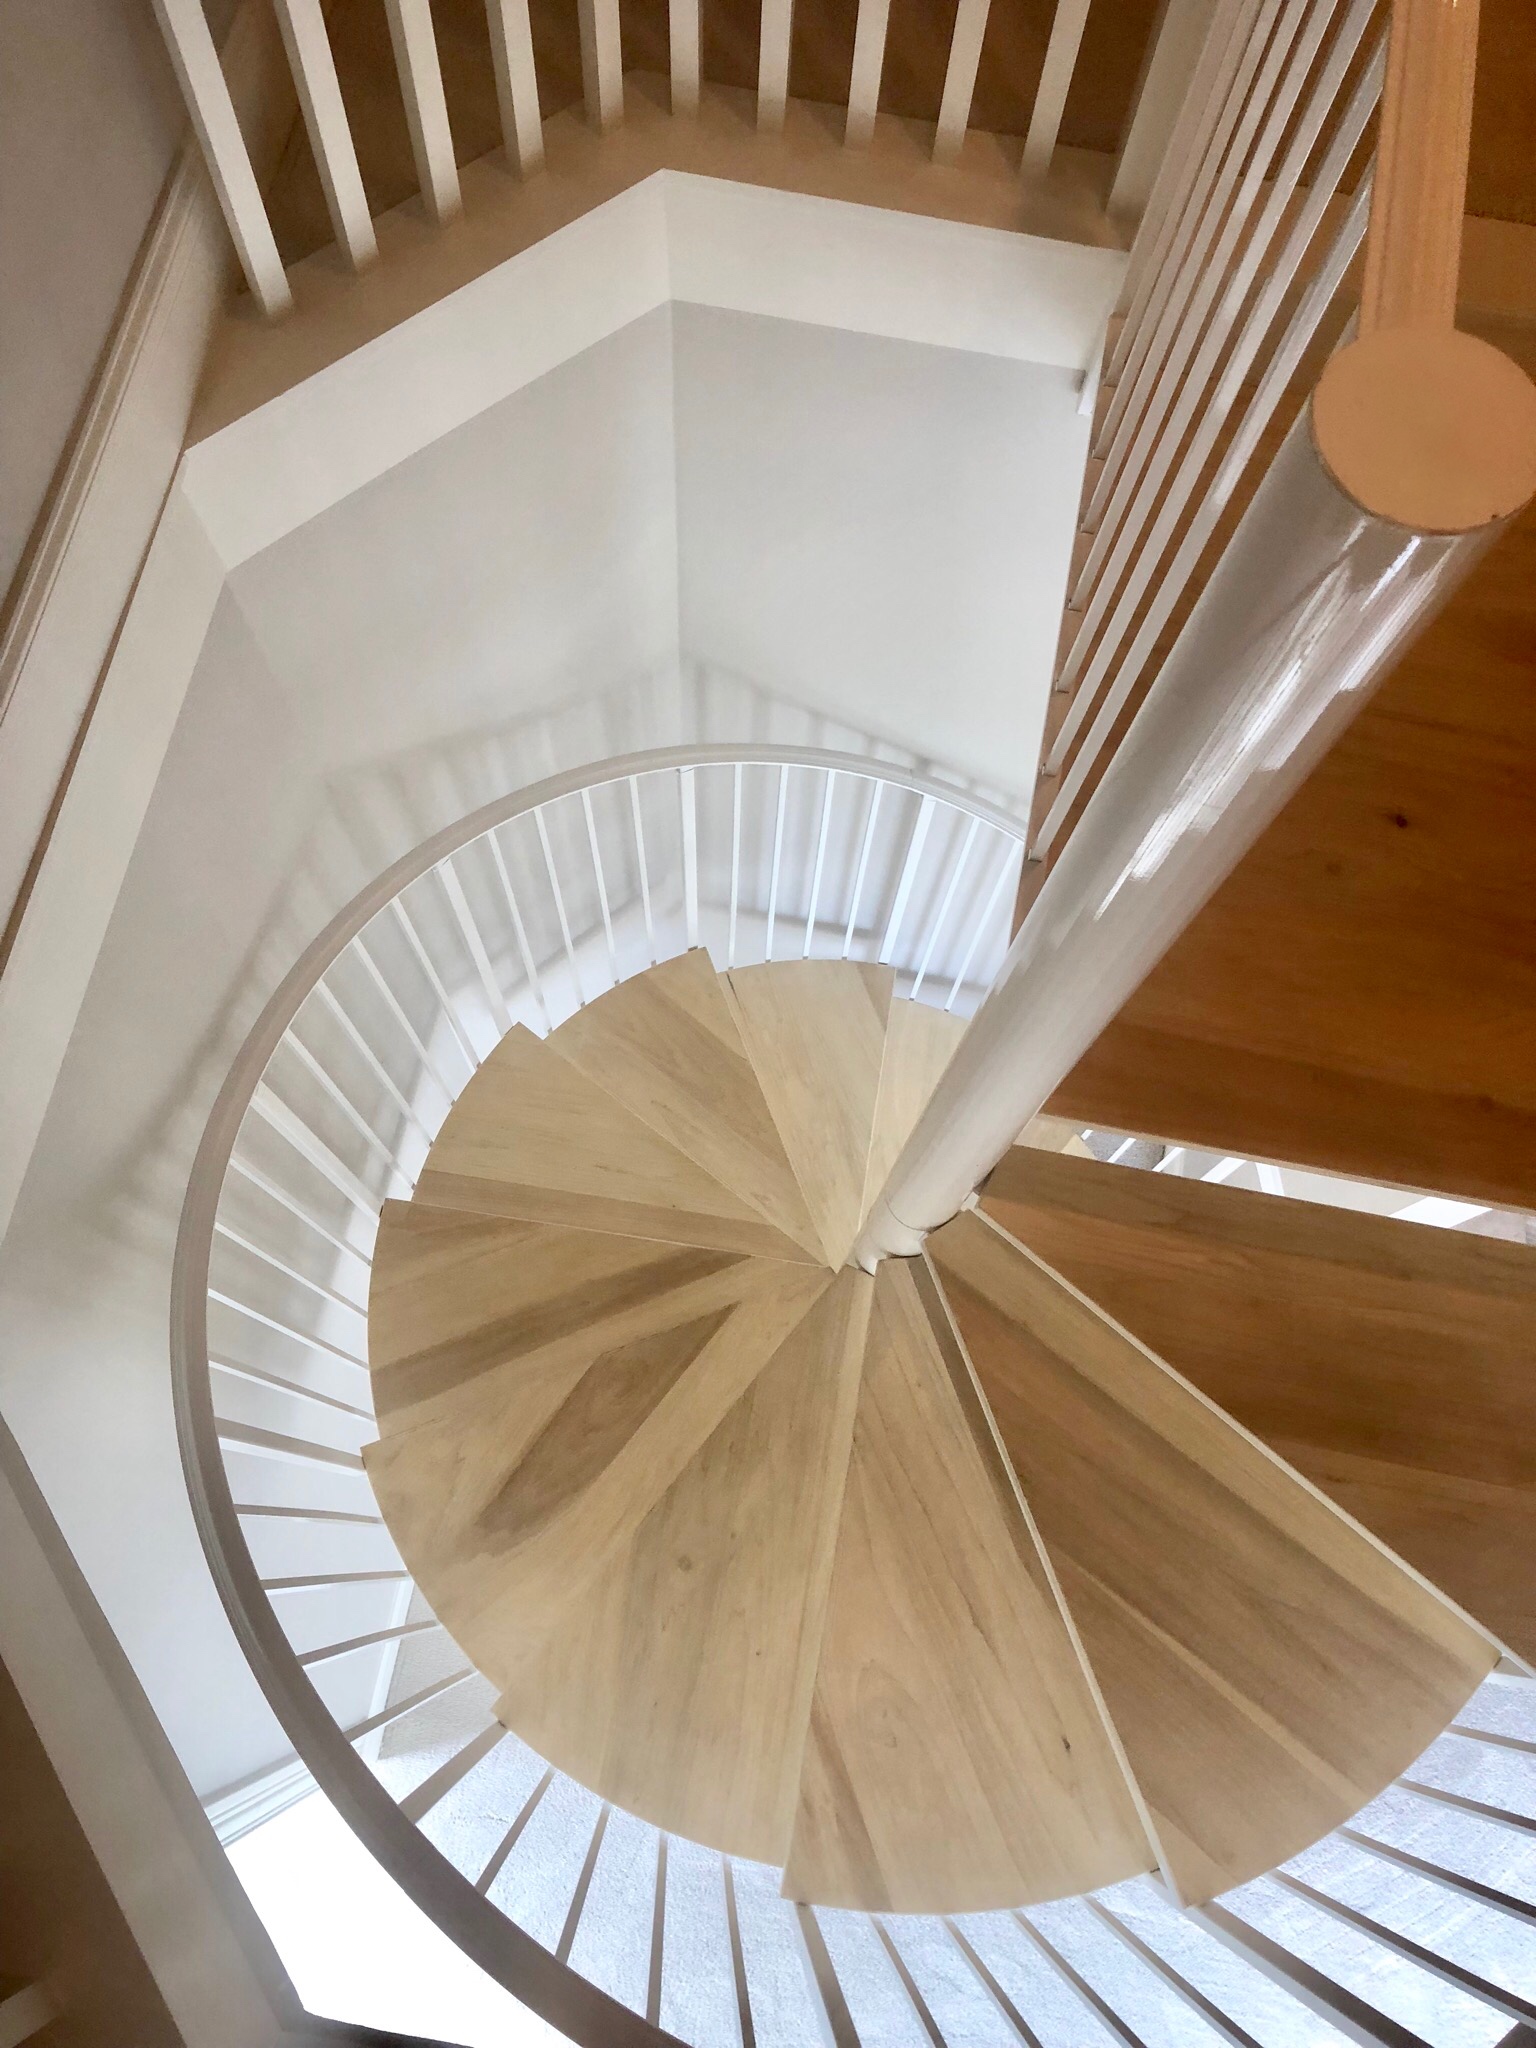
I think the upstairs is a perfect place for a desk, a sitting area, and some matching cabinets to hold things that are inspirational to me and maybe some extra shoe shelving. A girl can’t have too much of that. A place for me to retreat (aka. hide from the kids), lounge, read and blog. But, I guess we’ll see what I come up with. I do promise, once it’s complete, I’ll be sure to share all the details with you guys! For now, I’ll go upstairs just to look down. Ha! How cool is that architectural view?!
Closet Designer: Deidre Lampley of Beckwith Interiors
Cabinet Maker; McDonald Cabinetry
Spiral Stairs: Image Stair Design
Chandeliers: Restoration Hardware
Hardware: Atlas Homewares